

Set up your RV by following these basic tips
Setting up your RV doesn’t need to be stressful or difficult if you just follow a few simple guidelines and do each step in an order you shouldn’t run into any difficulty.
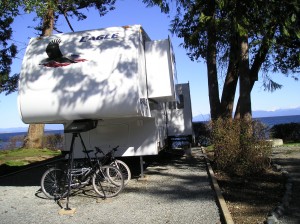
Choosing a campsite is the first thing on your list. It’s interesting to watch people drive around the campground in search of the perfect site and everyone has some specifics they are looking for but there is just a few simple things that should be important considerations.
What to watch for when choosing a campsite for your RV
- Level spot
- Watch for overhead wires, trees, etc. to prevent damage to the RV
- Pick a site that is long enough for your tow vehicle and RV unit
- Look where power and water hookups are – are they where you need them to be?
- Do you have enough room to let your slides out?
Once parked in the site the first thing that needs to be to done in this stage of setting up your RV is to level it to ensure your doors, closets and drawers all work properly. A level RV is also what’s needed to have your appliances work properly as well and for your slide-outs to seal. Take care of the side level first while the RV is still attached to the tow vehicle.
Tools needed to level your RV:
- Lynx leveling blocks
- Level placed on the floor just inside the unit
Place the leveling blocks in front of the tires that you need to raise up and then move your unit forward onto the blocks. Once the side to side leveling is done its time to level the unit front to back and disconnect the RV from the tow vehicle. It’s important to chock your tires first so it won’t roll off the leveling blocks.
Disconnect the tow vehicle and use the jack on the front of the unit. If you are fortunate to have a power jack you have it easy. For those with a manual jack it will involve cranking the jack to the right position with a board under it. Double check the level in the RV and if it’s level front to back it’s time to stabilize the unit.
Check the level to make sure it’s level from front to back and once that’s done its time to stabilize the unit. Make sure you understand the difference between stabilizing jacks and levelling jacks.
The jacks at the rear of the unit on each side are stabilizing jacks used for stabilizing the unit so it won’t shake. Place some wooden blocks under the stabilizer jacks. Crank them down until there’s some pressure on the wood and then add just a bit more for stabilization. Once all the stabilizer jacks are set up it’s time to power up the RV but before doing so, turn off the A/C.
Set up the Power System on the RV
Make sure you have a proper RV extension cord and not just one from home. If you have a 50 amp and are plugging into a 30 amp have an adaptor and plug into a surge protector before plugging into the supply source. Once it’s plugged in if there’s a switch at the supply source flip it on – you should have power in the RV. You can now put the slides out as well as the awning.
t>
Water system
Use a fresh water hose, a filter and water pressure regulator because every campground has different water pressure. Once it’s all connected you can now bleed out the lines and are ready to start using the taps. This means taking the air out of the lines by turning them on until the water flows properly. The water pressure regulator can be placed on the RV itself or at the tap source of the park.
Sewer hookup
Connect a sewer hose to the dump valve on the RV and place the other end at the dump station using an adapter so its’ secure. Make sure you leave the valves closed until its time to drain them when the monitor inside the RV indicates they are full.
Dumping the tanks
There are two tanks – a black tank for waste from the toilet and the gray water tank for water from the shower and sinks. When dumping drain the black water tank first then drain the gray water which will help rinse out the hose. If possible rinse out the black water as well by running water into it from the toilet. Close the valves when drained. It’s time now to add chemical and lots of water into the blank water tank. To ensure the tank doesn’t get plugged use RV toilet paper which decomposes faster than regular household toilet paper.
Safety tip
When heading out for a day and leaving the RV back at the site there are a couple of things that should be done before you leave.
- Roll the awning up
- Turn the city water off
Everyone has their own methods to set up the RV but the above tips are pretty standard and if you follow them it should prevent any problems with leveling, stabilizing, power, and water and tank drainage. It’s now time to enjoy your campsite. You now know how to set up your RV.
Happy Camping,
Carol Ann